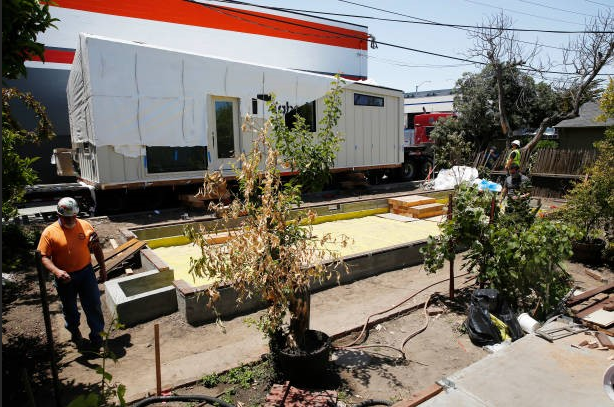
An accessory dwelling unit may be smaller than a primary home, but its construction can produce several concentrated debris streams on a property with little spare space. Excavated soil, demolition materials, lumber offcuts, packaging, roofing, and landscaping waste may appear at different stages rather than all at once.
A well-planned ADU Construction Project accounts for these changes before work begins. The central question is not only how much waste will accumulate, but how the rental will fit the property, schedule, and activities of each trade. Connecting those details early prevents the trailer from becoming an obstacle and creates an organized path from initial delivery through final collection.
Key Takeaways
- Identify debris types before choosing trailer capacity or disposal arrangements.
- Estimate debris volume and weight separately for each construction phase.
- Evaluate the access route and final placement area as separate planning decisions.
- Coordinate delivery, rental duration, exchanges, and pickup with the construction schedule.
- Confirm written rental terms and assign one person to supervise loading.
8 Junk Trailer Rental Planning Steps for an ADU Construction Project
Each step below addresses a separate rental decision, from identifying the debris to preparing the equipment for collection. Before booking, confirm trailer dimensions, weight limits, material restrictions, placement requirements, and local regulations with the provider and relevant permitting authority.
1. Define Debris Types Before Booking
Begin with the building plans and work sequence rather than making a general estimate of construction waste. List the debris expected from demolition, excavation, framing, roofing, drywall, flooring, cabinetry, and landscaping. An ADU construction project can produce different materials in short, concentrated waves, so connect each anticipated waste type to the phase that will generate it.
Organize the inventory into general debris, recyclable materials, dense waste, and items requiring separate evaluation. Flag soil, concrete, appliances, treated wood, chemicals, lead-painted components, and suspected asbestos-containing products. This step establishes what crews may need to separate before loading. Record the classifications in the site cleanup plan, so every contractor begins with the same information.
2. Estimate Phase-Wise Volume and Weight
Review the expected output of each construction phase rather than relying solely on the completed unit’s square footage. Demolition and site clearing may create a concentrated load, while framing and finishing work usually generate smaller quantities over longer periods. When planning a dump trailer rental, record the estimated debris volume, material density, and expected loading dates for every major phase.
Account for the difference between available space and permitted weight. Packaging, insulation, and irregular offcuts can fill a trailer quickly, while concrete, soil, tile, and roofing may reach the weight limit first. Include a practical buffer for broken or bulky pieces. When possible, compare estimates with those for similar projects and ask whether dense materials require a dedicated trailer, a reduced fill level, or a separate rental period.
3. Match Trailer Size to Property Access
Begin by checking the entire route between the street and the intended placement area. Measure driveway width, gate openings, overhead clearance, side-yard space, curb cuts, and distances between buildings. Check for roof overhangs, low branches, utility lines, parked vehicles, temporary fencing, and steep approach angles that could prevent entry.
Remember that the towing vehicle requires more space than the trailer, especially when backing up or turning in a narrow residential street. Share photographs, measurements, and the planned approach direction with the provider before selecting equipment. Confirm that the gates can open completely and that scheduled construction will not narrow the route. The same path must remain accessible when a heavier, fully loaded trailer is collected later.
4. Time Delivery with Debris-Producing Work
The trailer should arrive shortly before demolition, excavation, clearing, or any other activity expected to generate considerable debris. An unnecessarily early arrival can occupy valuable staging space, while a delayed arrival may force workers to create temporary piles that require additional handling. Coordinate the delivery window with the superintendent or lead trade.
Designate an on-site contact who can guide the driver and confirm the approved position. Review the daily schedule for concrete trucks, inspections, supplier vehicles, street sweeping, or subcontractor arrivals. On narrow residential streets, consider school traffic, curbside parking, and posted access restrictions. Separating these movements gives the driver sufficient positioning space and prevents trailer delivery from interfering with other scheduled work.
5. Select a Safe Trailer Placement Area
Choose the exact trailer drop location after confirming that the access route can accommodate the equipment. The surface should be level, firm, and free from septic components, shallow utilities, drainage structures, irrigation equipment, or unsupported pavement. Ask the provider which protective materials may be used on decorative concrete, pavers, or other vulnerable surfaces.
Mark the intended trailer footprint so the driver can evaluate it before unloading. Leave operating clearance for doors, ramps, or tailgates, along with enough space for workers carrying debris. The placement should not obstruct emergency access, neighboring driveways, material staging, or entrances used by occupants. Identify a backup hard-surface location if rain or changing ground conditions make the preferred area unstable.
6. Match Rental Period to Construction Schedule
Review the active loading timeline rather than basing the rental length on the entire construction project’s duration. An ADU construction project may experience inspections, weather interruptions, material delays, or changes in trade sequencing that create inactive gaps. Mark the expected loading window, possible exchange dates, and planned removal date on the construction calendar.
Compare one extended rental with several shorter, phase-based rentals. Continuous availability may support steady debris production, while scheduled exchanges can release limited space between major construction stages. Ask about extension notice periods, early-removal options, exchange availability, and related charges. Establish a clear service trigger, such as reaching the approved fill level or completing a specific phase, to prevent delays in collection decisions.
7. Confirm Pricing and Disposal Requirements
During dump trailer booking, review the included rental period, weight allowance, overage rate, extension charges, cancellation terms, payment schedule, and responsibility for equipment damage. Ask how additional charges are calculated and whether the quoted amount includes delivery, collection, fuel, and disposal-related fees. Request these details in writing before confirming the reservation.
Next, compare the debris inventory with the provider’s accepted-material list. Verify restrictions involving concrete, soil, appliances, chemicals, tires, batteries, and suspected hazardous materials. Determine who must obtain any street placement permit and whether proof is required before delivery. Keep the approved material list and provider contact information on-site so unexpected items can be addressed without relying on assumptions.
8. Plan Loading and Pickup Procedures
Clear site rules help workers load debris correctly without requiring them to interpret the rental agreement. Place dense materials low, distribute weight across the trailer bed, keep debris below the sidewalls, and prevent waste from accumulating around the wheels or coupling area. Assign one supervisor to reject prohibited materials and stop loading when the approved volume or weight limit is reached.
Request pickup when the relevant construction phase ends or the permitted capacity is reached. Before the driver returns, remove vehicles, supplies, fencing, and newly delivered materials from the departure route. Secure doors or gates per the provider’s instructions, and photograph the completed load for project records. A final walkaround supports safe collection and prepares the cleared space for the next trade.
Conclusion
Planning a trailer rental as part of the construction sequence keeps debris removal from interfering with inspections, deliveries, access, or trade work. Each decision should have a clear owner, confirmed timing, and written requirements that crews can follow.
When debris estimates, equipment dimensions, delivery dates, placement conditions, material restrictions, and pickup procedures are settled before work begins, contractors can concentrate on construction rather than on reorganizing waste. A final review with the provider and site supervisor can close any remaining gaps. This preparation helps an ADU construction project use limited residential space effectively, control avoidable costs, and maintain an orderly cleanup process from the first load through final collection.
Keep every stage of your ADU cleanup organized by scheduling dependable dump trailer delivery, flexible rental support, and timely pickup with Blue Bin Trailers.
FAQs
Can the Trailer Be Moved After Placement?
Never move loaded equipment yourself. Contact the provider because repositioning may require specialized towing equipment and another assessment of the site.
Who Should Manage the Rental During Construction?
Assign one person to approve changes, contact the provider, monitor loading, and ensure every subcontractor follows the documented rental requirements.
Should Nearby Residents Be Notified?
Notify nearby residents when delivery or collection could temporarily affect shared driveways, street parking, curb access, or normal neighborhood traffic patterns.
How Should the Site Be Secured After Hours?
Control site access according to provider instructions and prevent unauthorized loading, especially when the trailer remains clearly visible from the street.
Which Records Should Be Retained After Pickup?
Retain the rental agreement, weight receipts, disposal records, site photographs, and payment confirmation until every charge and documentation requirement is resolved.